
If you’re looking for the ultimate sweet-and-smoky BBQ appetizer, these Smoked Pineapple Pork Belly Burnt Ends deliver every time. Tender cubes of pork belly are slowly smoked until perfectly juicy, then coated in a rich pineapple BBQ glaze for an irresistible combination of smoky, sweet, and sticky flavors. Every bite is packed with melt-in-your-mouth goodness.
Whether you’re feeding a crowd on game day, hosting a backyard barbecue, or simply treating yourself to an incredible weekend cook, this easy recipe is guaranteed to become a favorite. Serve these pineapple pork belly burnt ends as an appetizer, party snack, or alongside your favorite barbecue sides for a meal that’s sure to impress.

Smoked Pineapple Pork Belly Burnt Ends
Ingredients
- 4-5 pounds pork belly
- 2-3 tbsp extra virgin olive oil
For the rub
- 1/4 cup brown sugar
- 1.5 tbsp kosher salt (kosher or sea salt)
- 1/2 tbsp smoked paprika
- 1/2 tbsp sweet paprika
- 1/2 tbsp black pepper
- 2 tsp garlic powder
- 1 tsp onion powder
- 1 tsp mustard powder
- 1/2 tsp cayenne pepper
Pineapple BBQ Glaze
- 2 tbsp extra virgin olive oil
- 1 medium onion, diced
- 3-4 garlic cloves, minced
- 2 cups pineapple, diced
- 1/2 cup brown sugar
- 1/4 cup ketchup
- 1/4 cup apple cider vinegar
- 1/4 cup unsalted butter
- 1/2 tbsp kosher salt
- 1 tsp sweet paprika
- 1 tsp cayenne pepper
Instructions
Pineapple BBQ Glaze
- Heat the olive oil in a medium saucepan over medium heat. Add the onion and cook for 5–6 minutes, stirring occasionally, until soft and translucent without developing significant colour.
- Add the garlic and cook for approximately 1 minute, until fragrant.
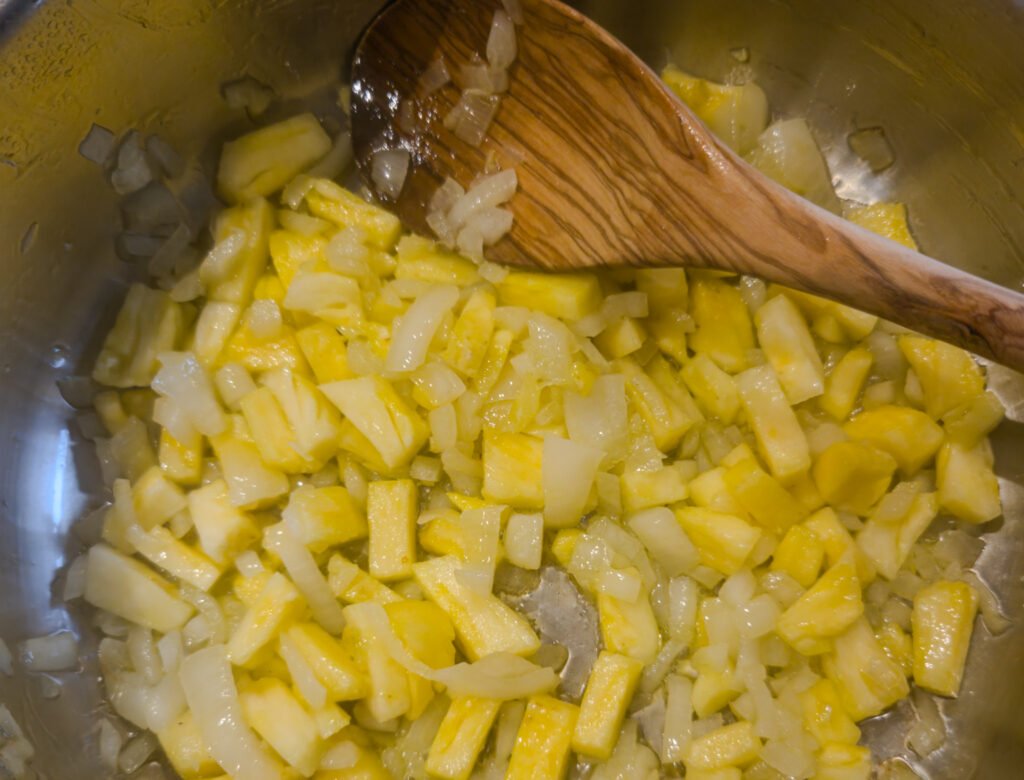
- Add the diced pineapple and cook for another 3–4 minutes, stirring occasionally, until the pineapple begins to soften and release some of its juices.
- Stir in the brown sugar and ketchup and cook for approximately 1 minute. Add the apple cider vinegar, paprika and cayenne pepper and bring the mixture to a brief boil.
- Reduce the heat to a gentle simmer and cook until the glaze has visibly reduced and begun to thicken. When you drag a spoon across the bottom of the saucepan, it should leave a trail for a moment before the glaze flows back together. Don't worry about bringing it to a finished BBQ-sauce consistency at this stage—the glaze will continue to reduce and concentrate as the pork belly finishes cooking.
- Remove from the heat and stir in the unsalted butter until completely incorporated. Season with kosher salt, tasting and adjusting if necessary.
- The finished glaze should be tangy and slightly sweet, with enough acidity to cut through the richness of the pork belly.
Prepare the Pork Belly
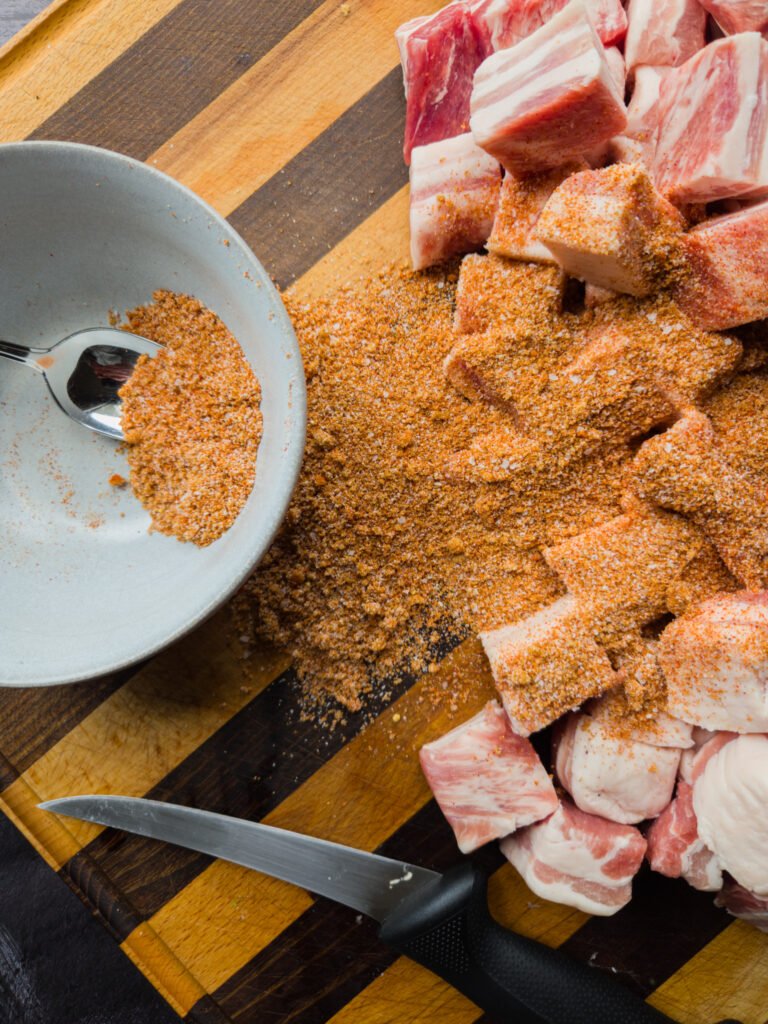
- In a small bowl, combine the brown sugar, kosher salt, smoked paprika, paprika, black pepper, garlic powder, onion powder, mustard powder and cayenne pepper. Mix well and set aside.
- Trim away any excessively thick or hard exterior fat from the pork belly, but avoid over-trimming. The fat and marbling are essential to keeping the pork rich and tender throughout the long cook.
- Cut the pork belly into approximately 1½-inch cubes. Keeping the pieces relatively uniform will help them cook and render at a similar rate.
- Transfer the pork belly to a large bowl and drizzle with the olive oil. Toss until each piece is lightly coated. Add the spice rub and toss again, using your hands to work the seasoning over all sides of the pork.
- The pork should be generously and evenly coated, but there shouldn't be a heavy layer of loose seasoning collecting in the bottom of the bowl.
Smoke the Pork Belly
- Prepare your smoker for indirect cooking at 250°F (120°C). Apple and cherry wood will give the pork a milder, slightly sweeter smoke, while hickory will provide a stronger smoke flavor.
- Arrange the pork belly cubes directly on the cooking grate, leaving a little space between each piece so heat and smoke can circulate around them.
- Smoke for approximately 2–3 hours, maintaining the smoker near 250°F.
- Rather than relying on internal temperature alone, look for the pork to tell you when it is ready for the next stage. The exterior should have developed a deep reddish-brown colour, the spice rub should be set into a noticeable bark, and the fat should have begun to soften and render. The pork will not yet be fully tender—that happens during the covered cooking stage with the Pineapple BBQ Glaze.
- Once the bark has developed and the pork has taken on a good amount of smoke, remove the pieces from the smoker and transfer them to the prepared roasting pan.
- Using a Weber kettle? See the Weber kettle method below the recipe for the briquette snake setup used to develop this recipe.
Glaze and Finish in the Oven
- Preheat the oven to 250°F (120°C).
- Transfer the smoked pork belly to a foil- or parchment-lined roasting pan. Add the Pineapple BBQ Glaze and gently toss until the pork is evenly coated. Cover the pan tightly with foil.
- Transfer to the oven and cook for 45 minutes. Remove the pan, uncover and gently toss the pork through the glaze again. Cover tightly and return to the oven for another 45 minutes.
- At this point, check the pork for tenderness. The cubes should be very tender with little resistance when pierced, while still retaining their shape and a slight bite.
- Once the pork has reached the desired tenderness, remove the foil and return the pan to the oven for another 15–20 minutes, allowing the glaze to reduce and become sticky around the burnt ends.
- Remove from the oven and allow the burnt ends to rest for 5–10 minutes before serving.
Smoking These Burnt Ends on a Weber Kettle
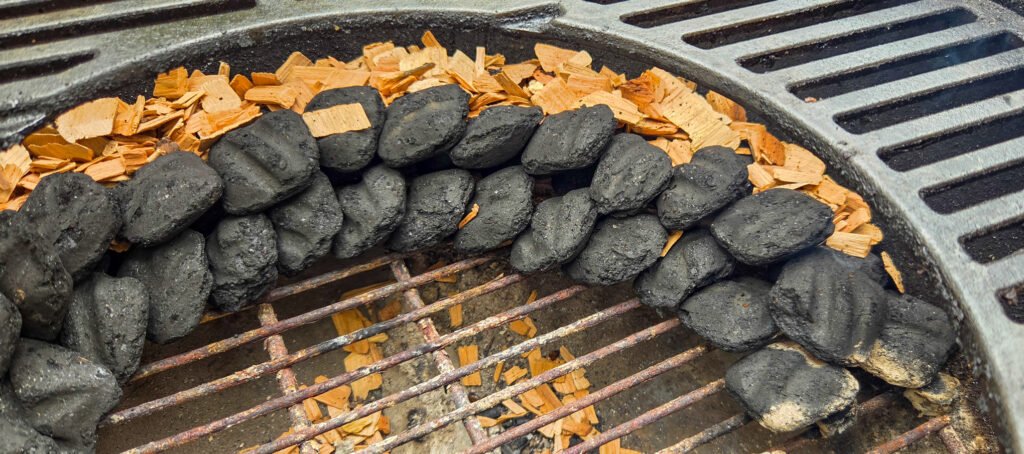
You don’t need a dedicated smoker to make these pork belly burnt ends. This recipe was developed using a Weber kettle and a simple briquette snake to create the steady, indirect heat needed for a long smoke.
As shown above, arrange the briquettes around roughly half the circumference of the kettle. Build the snake with two rows of briquettes on the bottom and a single row centred over top. Light the snake at one end so the briquettes ignite gradually rather than all at once. This creates a slow-burning heat source that can be controlled to maintain the kettle at approximately 250°F (120°C).
For the smoke, distribute wood chips along the first half of the briquette snake. As the lit briquettes work their way around the kettle, they will gradually ignite the wood chips and produce smoke during the earlier portion of the cook. There is no need to produce heavy smoke for the entire cooking time—the goal is a steady, clean smoke while the pork develops its colour and bark.
Place the pork belly on the opposite side of the grill from the burning briquettes, keeping it over indirect heat. Position the lid so the top vent is above the pork rather than directly above the charcoal. This encourages the heat and smoke to travel across the pork before exiting through the vent.
Use the kettle vents to regulate airflow and keep the temperature as close to 250°F as possible. Don’t worry about holding it to the exact degree; a steady cooking environment is more important than constantly chasing small temperature fluctuations.
From here, follow the same cues as the main recipe. Once the pork has developed a deep reddish-brown colour, the rub has set into a good bark and the fat has begun to render, it is ready to come off the kettle and move into the glazed oven-finishing stage.
Building Better Burnt Ends
Smoke First, Glaze Later
The first stage of this recipe is all about building smoke and bark. The pork belly goes onto the smoker with just the spice rub, giving the outside time to develop color and take on plenty of smoke before we introduce the Pineapple BBQ Glaze.
Adding the glaze too early would put a lot of sugar onto the pork while it is still trying to develop that bark. By waiting, we can build the smoky flavour first and then add the sweet and tangy glaze during the slower finishing stage. The end result gives you both: a good smoky bark underneath and a sticky glaze around the outside.
Why Pineapple Works Here
Pork belly is rich and fatty, especially after several hours of rendering, so I wanted a glaze that could stand up to it without simply adding more sweetness.
The pineapple gives us plenty of natural sweetness and fruitiness, but the apple cider vinegar brings a sharper, almost Carolina-style BBQ tang. That acidity is important. It cuts through some of the richness of the pork and balances the brown sugar and ketchup rather than letting the glaze become overly sweet.
Put that against the heavier smoke from the pork and you get a nice balance of sweet, tangy and smoky in each bite. The pineapple also gives these burnt ends a slightly different character from a more traditional brown sugar-based BBQ glaze without taking the dish too far away from what makes burnt ends great in the first place.
Two Cooking Stages, Two Different Jobs
There is a reason we don’t just leave the pork belly on the smoker from beginning to end.
The smoker does the heavy lifting when it comes to flavour. This is where we develop the bark, build smoke into the pork and start rendering the fat. Once we have those things where we want them, there isn’t much benefit to continuing to burn fuel while the pork is covered in a pan.
Moving the glazed pork to a low oven changes the job. Covered, the pork can continue to slowly render and become tender while cooking in the Pineapple BBQ Glaze. Once the pork is tender, removing the foil for the final part of the cook allows some of that moisture to escape and the glaze to reduce and become sticky around the burnt ends.
We’re looking for pork that is very tender but still has some bite and holds its shape—not pork that falls apart as soon as you pick it up.
Tips for Getting the Cook Right
- Glaze too thin, but the pork is ready? Don’t keep cooking the pork just to thicken the glaze. Remove the burnt ends and keep them covered while you reduce the glaze separately on the stovetop. Once it has reached the consistency you want, return the pork to the pan and toss everything together.
- Don’t chase the smoker temperature. Maintaining a reasonably steady temperature around 250°F is more important than holding it there perfectly. Small fluctuations are normal, particularly when cooking with charcoal. Avoid constantly adjusting the vents because the temperature has moved 10–15 degrees.
- Trust the bark, not just the clock. The 2–3 hour smoking time is a guide. Look for a deep reddish-brown colour, a spice rub that has set into a good bark, and fat that has begun to soften and render. Those cues will tell you more about when the pork is ready for the next stage than the clock will.
Storing & Reheating
Storing Leftovers
Allow the burnt ends to cool before transferring them, along with any remaining glaze, to an airtight container. Store in the refrigerator for up to 3–4 days.
Keep as much of the glaze with the pork as possible. It will help protect the burnt ends from drying out and gives you something to work with when reheating.
Reheating
For the best result, reheat the burnt ends gently in the oven. Place them in a small baking dish with the remaining glaze, cover with foil and warm at 275°F (135°C) until heated through.
Once hot, remove the foil and return them to the oven for a few minutes to loosen and reset the glaze around the pork. If the glaze has become too thick in the refrigerator, add a small splash of water before reheating rather than adding more BBQ sauce.
For smaller portions, the microwave will work, but use shorter intervals at a lower power if possible. The goal is to warm the pork gently rather than cooking it again.
Freezing
The burnt ends can also be frozen, although the texture of the glaze may change slightly after thawing. Freeze the pork together with its glaze in an airtight container for up to 2–3 months.
Thaw overnight in the refrigerator and reheat using the covered-oven method above.